Hi there thanks for stopping by today.
I got up early this morning so I have just been finished a card I made yesterday..it's for the next Claritystamp blog challenge so you will have to wait until 1st February before you can see it .
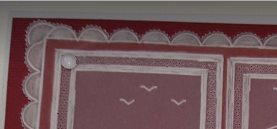
This is the final card we did at the crafty company groovi workshop.
I wanted to show how you can make a fancy edge using the starter kit..we also used the nested squares .
The edge is made by using the single letterbox square. From corner to corner in measures 2.5 cm so we drew a box in pencil that measures 15 x 15 cm.
Turn the parchment over to emboss from the back. Start at one corner and match the two diagonal edges of the letterbox along the line. Move along and do the second square. Repeat until you get to the other corner. Do this for all four sides.
Turn over, rub out the pencil line. Turn back over and then remake the square using the line for water on the landscape plate as it is just a straight line.
Replace the landscape plate with the nested squares you will see that the big square more or less matches the edge of the hole in the plate mate making it very easy to get square. When happy with the placement tape down your parchment and trace a couple of square frames.
Make little squares in the frame by using the nested square plate. Use the little square from the accents in alternate boxes.
Add the tree in the centre box. The border is made from randomly tracing the leaves.
Add best wishes from the lower case letters.
Do some whitework on the back.
I mounted using brads
Posted via Blogaway
Monday, 25 January 2016
Best wishes

Friday, 22 January 2016
groovi dt samples - rose and trellis
IT'S FRIDAY!
(not that it makes much difference to me as I am retired - well supposedly as I am very busy hahaha)
I did blog all this once before lunch from my phone - I was testing it out - but it finished up and the Claritystamp dt blog which is what we use to gather all the pictures together for the challenge blog!! I have no idea how that happened lol but I had to delete it! So now I am on the laptop
Thought I would blog last of my samples for Maria's last show on Hochanda.
Looking forward to seeing Paul on Sunday he's on at 10, 2 and 5
So my last sample uses the lovely new rose plate and the trellis plate

I started with the nested squares and made a frame. I then lined up my parchement on a grid and pierced three rows around the edge - 1 for snipping and two for decoration.
I went back to the platemate and added the rose plate followed by the trellis to fill in the background.
I did a bit of white work and colouring with SN pencils from the back
I also used a 4 needle piercing tool to go in the blank bits of the trellis.

Yesterday's workshop over in Fleetwood went well and I am going back on 6th February to do a groovi demo.
Have a great weekend
Thursday, 21 January 2016
groovi workshop
Scheduling this post to go live in the morning as tomorrow I am off to the
in Fleetwood where I have been asked to run a groovi workshop just using the starter kit. Apart from the very final card - every single bit has been done just using the starter kit.
The groovi system is new to the shop so lets hope that the ladies like it .
I am looking forward to it as I go to the shop often to demo for Crafters Companion and they are a great bunch of customers
Here's a selection of what we will be doing if we get through them.


this one is inspired by Dee Paramour she did a lovely one that was really cool but I couldn't figure it out so this is my version lol

I know that they also have some nested shapes in stock so we will do this one if we get a chance

Wednesday, 20 January 2016
groovi dt sample - octagons and tags
Hello there back again with another dt sample
I came on the lap top this morning to do one thing - a blog post but I got distracted trying to figure google plus next I knew it was lunchtime and still I hadn't written this post.
I have now had my soup so will fill you in on how I did this

I started by creating a frame using the octagon plate. I then decided to add the tag "head" around the edge. I place the ones over the corners first keeping a mental note of where I lined them up then the ones on the straight edges I just eyeballed in the middle .
To make the box in the middle I first used the line sentiment without embossing the line in the middle of the frame. Then using the tag I created a box around it by filling my parchment around to get the shape at both ends - I quite liked how that turned out .
I then used various sizes of the small octagons to create the patter over lapping but stopping when I got to the edge or the central box. I used a white, dark blue and paler blue pencil to colour in' added some white work to the frame and pierced and snipped around the edge
Thanks for stopping by today
Tuesday, 19 January 2016
groovi dt samples - trellis, lattice, tags, peonie
As soon as I saw the trellis plate - it just reminded my of those boxes that people little trees in outside their doors

So here is my version lol

Using a grid and piercing I pierced a rectangle the right size to mat and layer on an A5 card.
I used the faux stitching line from the border plate.
then I made a faint pencil mark where the middle was and lined up one of the tag and just did three sides then flipped my parchment around to create the top I did the middle one first so I could match the spaces in between then did the outside ones. I added the arch top from the top of the tag then filled in the centre with the trellis.
I then added the three peonies (these were my "bushes") then added stems with the border plate
coloured in from the back and snipped around the edge. Matted and layered on some G45 paper

Monday, 18 January 2016
groovi dt samples - rose plate

I started by using one of the leaves from the rose plate and by rotating it around and around I ended up with a large flower...it was a bit messy in the centre but I knew I was going to put this big dazzler on . I added a bit of white work and coloured from the back.
I then made a square with the border plate and added dots from the same plate
I then used the sprig plate to make a background before sticking the flower on top with glue in the middle and covered it with the dazzler

Friday, 15 January 2016
groovi dt samples - frilly circles, sprig and nested octagens
Home from a lovely break and the journey was uneventful.
A beautiful sunny day but chilly still it was nice and toasty in the car! You know how I am always saying it rains a lot here ? well we drove all the way down in lovely weather until we hit Lancashire then the heavens opened and it rained all the way to Preston!! it fined up a bit but as soon as we parked up and needed to unload the car - down it came again ...
I have had a busy old afternoon finishing off the groovi samples I have been doing whilst away for a groovi workshop next week in Fleetwood
Any way I thought today I would blog this card from Maria's show on Wednesday

I started by using the frilly circle but I just did the outside then I went around one of the octagon lines that looked about right then I did a smaller one and then moved it around you can see from the pic how I did it

I did a frame to fit around the edge using the lines from the border plates and then added a rope border inside the two sides . Next came the sprig plate followed but the line sentiments - without the lines.
Finally I added the flowers but also did some extra so that I could layer them up

I cut out the flowers, added some white work and some colouring for the leaves. I pierced around the edge and snipped out but I also used a fine grid to pieced between the octagon frame

Thursday, 14 January 2016
groovi dt samples - rose and trellis
Sad evening as its our last for this break up on the bonnie bonnie banks of Loch Lomand.
I shall miss looking at this view from our window!

I missed Maria's 3pm show yesterday but was lucky to catch it on repeat this evening.
It's very exciting for me seeing my cards on the telly and Maria had one on the counter in front of her - feeling very privalleged!
I thought I would just blog the first of may samples before I settle down to watch a bit of telly. I did bring groovi with me and I have been making samples for a workshop this next Thursday at the Crafty Company in Fleetwood.

I decided to create a basket of flowers so I used the octagan set and just the bottom part. Next came the inner parts of the roses - just really to make it all in proportion. I started with the bottom row
( that would be covering the rim of the basket) then just kept building it up . I then used the trellis to fill in the octogan. I made a frame, added the fauz stitching then the zig zag border. I pricked and snipped it out, added a bit of white work and some colouring with SN pencils.
Thanks for stopping by time to put my feet up for the evening !
Wednesday, 13 January 2016
groovi dt samples - Holly
Final one from Barbara's show on 3rd January 2016

I thought I would see if I could make the frilly circle frame match the nested oval.
So I started by doing the oval then I used the frilly border a little at a time - I kept make the circle on the plate match the oval - if you know what I mean
Any road up it worked a treat and I was happy.
Next I added Holly and the fence is made using the border from Douglas for the fence. The landscape plate came next to create the path and a couple of hills.
I pierced around the edge and snipped it out. Before colouring in I chose a shaving foam background from my stash. then decided it would be nice to add some green for the hills
At this stage I decided to cut snip out the sky so that the shaving foam background could be seen more clearly. I then laid the oval on top and to see where to add the green ink using a clarity brush
I coloured in Holly and the path

I then made the blue skies separately, coloured in and cut them out .
I used these to hide the glue to stick it all together
groovi dt samples Lily & Douglas
Anniversary card today
made using Lily and Douglas I made the heart first with the nested heart plate
added Douglas first then Lily slightly behind him. I added the line sentiment at the top and bottom then extended the line to create a frame. add some hearts in the corner and the Lily accent from the border

the background looked a bit plain so I used a round piercing tool and added an embossed dot in the middle. added a little white work and coloured in from the back with spectrum noir pencils

mounted on black and red card to tone in
Tuesday, 12 January 2016
groovi dt samples - Altered Annabel
hello again
I started with Annabel but didn't want to use all her frock - so I altered it by extending the plain section then I used the bottom with the frill and started in the middle then extended it to meet the sides of the skirt. I did the same again to make the border but without the lace then inserted some hearts from the Lily border plate I then used the nested oval to frame herd, then the nested squares to form a rectangle around the edge, added some background from the landscape plate - some little birds from the plate mate. I used the large accent to create a "ribbon" behind the oval , then used the edge of the border on the plate to form the edge of the oval .
I added some parts of the large accent in the corners. and filled in the frame randomly with bits from the border

I pierced around the edge and snipped it out.
I created a larger rectangle and again used the lacy edge around the frame and again snipped around. mounted it on brown pearly card

Monday, 11 January 2016
groovi dt samples - Annabel& Laurel
Here I am with another sample I decided to make something with Laurel but wanted to put something in her hands - Martini's seemed a good plan - utilising the capital Y & T from the letter section of the plate mate ---I think it works quite well so here she is celebrating with Annabel

I used the laurel accent to create a frame then added some of the smaller laurel flowers around the bottom.
The corner pieces were created using one of the large laurel leaves and then I did some piercing and snipping.

I used a gelli plate print from my stash for the background
Sunday, 10 January 2016
groovi dt samples - stater kit
It's Sunday evening and I have been trying to blog the rest of my samples all week without success!
So I am going to try to do them now and schedule a few - hope fully get them all in this week.
We are off to bonny Scotland for a few days tomorrow - the weather forecast has changed for the worse so we might get snow - but I hope not I am rubbish at driving in snow,
I have however just packed up my groovi stuff to take with me!!!
I made this doing the trees on a piece of parchment and added a few hills then I used the full stop from the plate mate to create a border I cut it out but it looked a bit lost so I got another piece and drew a pencil line around the edge then used the / plate mate and line it up along the pencil line. from the back. when it was done I just rubbed out the pencil line.
\

Then came the tricky bit - lining up the hills with the ones I had already put on the top piece - without the top piece being adhered!
after much faffing about I managed it I didn't want to duplicate the hills on the bit that was under the top piece if you get my drift.

Added a little white work and mounted it on some printed paper with brads
Thursday, 7 January 2016
Groovi dt samples - White cliffs of Dover
Finally got around to writing a blog about this card.
I was watching a programme on the telly and it showed a shot of the cliffs and it suddenly came into my brain to re create it
It is made entirely from the starter kit using the landscape plate

I then made another line next to it to make a border. On the outside I created a row of dots with one of the accents on the plate mate.
Then I looked at the hill lines and decided which one to use for the top of the cliffs then I adjusted the parchment to make another line for the grass top
I used the sweeping line (under the straight one) for the base of the cliff then I used the line above the straight line as it the bump looked a bit like a wave so I just kept moving the parchment about to make my waves.
Added the moon and some birds from the plate mate accents.
I turned the plate around and used various lines to make crevices on the cliffs.

before I started the white work on the back I added some shadow with a SN pencil can't remember which one but it was a yellowy brown colour and obviously green for the grass, I didn't do too much,
The white work took several days I kept doing some then leaving it to rest until I thought I had gone far enough. At this stage I went over with a white pencil
I pierced around the edge with a two needle tool and snipped around but you could leave it as a straight cut.
Monday, 4 January 2016
Groovi dt samples -Lily and Rosie
Did you watch Barbara Gray on the telly yesterday if so you will know already but here's my very exciting news......
I have been invited to join the groovi design team how exciting is that!
Some of my first samples were on yesterday's show and Barbara told everyone my news.
I will try and blog them during the week.

I used the nested octagons to make a frame I used lines 2 and 3 in from the edge I then moved the parchment around to the middle of the straight edge and then went around line 2 again.
I then added Rosie followed by Lily as she is a little behind Rosie. I added some of the accents on the Lily border plate.
I did some bits of white work, coloured in from behind with Spectrum Noir pencils .
I pierced all around the edge then used my snippers to cut out

I used a circle cutter to cut out two mats and then mounted everything up
Friday, 1 January 2016
Claritystamp challenge 35 - Say it with flowers
HAPPY NEW YEAR
WELCOME 2016
What will it bring for us all I wonder?
I may just have some very exciting news - but cannot say just yet!!!!!!
Whatever happens I wish you health, wealth and much happiness.
I got a shiny new laptop for Christmas and this is my first blog post using it ....Windows 10 what a long way from Windows Vista!!! so far I am liking it and this new lappy is soooooooo much faster than my old one.
So its time for a new challenge - say it with flowers - wouldn't it be lovely to see some flowers growing? - Roll on spring , and I am sure that all those poor victims of the terrible floods will be wishing it was here if only to assist in the drying out process!
As ever we had some fantastic projects for the last blog challenge so thanks if you entered and picking my top 5 was not easy - it never is there are many very talented crafters out there!
Here's my piece for this month

I decided to try a triptych type of design - I hope you like it and I used the poppy plates the bird is from the the bauble border.
I started with the nested squares . decided which ones would fit three across my parchment and the elongated them to give me three panels.

As usual I started out taking pics .....but then I forgot!
Here's what I came up with but then decided it needed a little something going on in the background

Enter the landscape plate from the starter set and the bird from the border
The little birds in the sky come from one of the little elements around the groovi plate mate
I added a border around the edge from the border plate 1
I started adding white work - now I am not too good at this but I keep practicing -
I then uses a two pronged piercing tool around the edge and then snipped around the edge.
mounted on to red card using some little white brads


Thanks for visiting and I look forward to seeing all your lovely entries x
Subscribe to:
Posts (Atom)