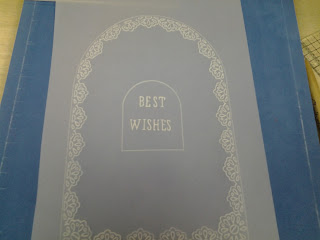
SEPTEMBER!!!!
Before we know where we are Christmas will be here - I haven't made a single card yet - yikes
The bingo challenge last month threw up some fantastic entries - I wonder who will win - I know it was extremely difficult to pick my fave 5.
So to this month's challenge - Shaped cards - what to do - what shape to use - should I use a die - got plenty of those - or do I take my inspiration from the lovely parchment box that was on Emma Burns blog recently - oh she is one very clever lady - I know my work with parchment is not in the same class as Emma's - it isn't even in the same school lol but I liked how she used the groovi system to create her shapes so here is my effort.....
I transferred the pattern from the border plate and in the bottom two corners I switched it around to make more of a flower (and fill the gap).
I also did the same trick with the nestie groovies to form an arch in the middle then I marked the central line and split it into three to give me a guide to line up the letters. ( I did it in pencil so I could rub it out after)
As an aside I have also used the tiny square from the nestie groovi plate to mark out like the larger squares on the groovi mate - it is the perfect size for these small letters
So now this is where all my best laid plans go pear shaped because I forgot to take any more pics Doh
Next I transferred two of the flowers from the blooming peonies plate and then I added a third in the middle - behind. I also did two more on another piece of parchment so that I could cut out and layer up.
Behind the best wishes I used bits from the Christmas tree to fill up the space - just randomly
Finally I used the Netting plate to create a background.
I used a star embossing tool (borrowed from a friend as I haven't got lots of stuff....yet!) i just did it by eye.
I did a little embossing from the back and no 15 speccie pencil from the essential set. I also coloured in the parts of the border that I hadn't embossed so I could hide the bits of red liner I used to stick it down.
I thought it may be useful to show you the plates I used


